Saturday, July 31, 2010

Zoe Lily-baldy-Belle


She sort of looks like a cancer patient here. What with having no eyebrows or lashes, as well as being bald.

speakofthedevil

I recently rented Girls Just Want to Have Fun. I can't recall what made me add that to my Netflix queue, but when it came up, I shrugged, figured, why not?
Ugh.
No wonder this isn't an 80's classic. The opening scene is really solid, but the rest of the movie is forgettable.

Except...
Wait...is that...?
Uh...I'm pretty sure that's...
Ah, yes. It is.

He and his partner (not SJP, the one in the matching outfit, second pic - dig her 80's do! Mine was just like that, only brunette, back in the day) make it to the finals of the Dance TV contest (which is the core of this movie), and the announcer says who they are, gives them names, but he's only listed in the mass section titled "dancers" in the credits.
I guess because he doesn't actually ever say anything.
In words, anyway.

His expressions speak volumes:
Look at him, checking out SJP! (and check out the earring!)

Are they exaggerating the height difference here? I had the impression he was kinda on the short side. For a guy, anyway. Sarah Jessica Parker is only 5'3"...so...okay, that would mean he's 5" or so taller, according to this shot, so 5'8"? Yeah, that's still short for a guy. It's just that in this scene, the older guy in the vest says to him "my, you are big, aren't you?"

I'm sure I'm coming late to this party. The movie came out in '85, after all.
It just...made me laugh out loud. There was no-one at home I could share this with, without having to explain it, you know? (If you don't get it, I'm sorry, but I can't explain, except to say I'm flirting with irreverence in posting this.)
So someday, when in a certain place, you hear someone (me) trying to stifle a giggle fit? I most sincerely apologize. This could take me a while to get over.

Friday, July 30, 2010

Graphics Fairy

I only just recently discovered The Graphics Fairy, but I'm totally hooked.

She finds vintage images, scans them, cleans them up a bit (for visual clarity), and then offers them all to YOU, for FREE, to do whatever you like (mostly - see her terms).

Did you know, you can take a Xerox of something, say, this awesome image of a chair (I love chairs...),
(found here, on her blog) and iron it on to fabric?!?

Yup, you can. Seriously.
I've only done black and white. I'm pretty sure color doesn't work so well that way. But as there are so many cool images from old catalogs that were only printed in black and white, there's a lot of stuff you could do with this.
This produces a lighter image than the printed version, but it will be permanent.
You just need a fresh Xerox image (or any other toner-based print - meaning laser, not ink-jet), a hot iron, and some fabric. I've mainly done it on cotton (natural fibers work best, with a tight weave), but I'm eyeing this piece of cream-colored silk I found in the remnant bin at JoAnn's. It was seriously discounted, so I'm willing to risk it.
Your image will be reversed, of course. But, you can easily reverse the image, before you print it out, in programs like Paint, or other image software. Handy when there are words or numbers.

The Graphics Fairy also shows you how to put any printed image onto fabric here, using something called Citra-solv. I'd never heard of the stuff before, but I'm willing to try it, if I can find some locally.

If you try it, be sure you test it first, on a scrap, to make sure you're getting the results you want before picking up something more expensive to work with.

I'm going to print me out this dress form, and make it up into a pillow, probably just plain muslin, but with a fringe around it.

Zoe has issues

I'm having some issues with this pattern. I've emailed the designer, but no reply yet (though I'm sure she will). and she's made suggestions/corrections within the original pattern now.

On the round after the nose, I wasn't sure how to work around the 5 hdc cluster, which wasn't really done like a bobble (which would leave you with one stitch at the top to work through on the next round), but I liked the way it looked being "open" underneath, so I just did a sc in the first hdc, then moved on to the next sc.

Later on the head, Rnd 18 should read something like: *1sc, 2sctog* repeat 6 times (12). Sure, if you just do 6 decreases, you'll end up with only 12 stitches, but you won't have finished the round, and all the decreases will be to one side. If that was intentional, I'd like a little nod to that in the directions, you know?

Also, at this point, it's hard to put the eyes on through that little hole, so I ended up ripping it back a rnd or two to save my fingers. Stuffing, you can do through a small opening, but inserting the eyes is hard enough without limiting yourself to only one digit working from the inside. I made myself a note to insert eyes and stuff the head before Rnd 18. I'll embroider lashes and brows later.

(I'm feeling neutral on the whole slip stitch rounds when changing colors thing. It looks nice, but it also makes it a bit crowded when you're working the next round.)

On the skirt, if you want it to look like the picture, Rnd 28 should just have 1 sl st in between each picot, instead of the 2 you would work if you do repeats from the start of the rnd. It ended up one short, but you can't tell, and I liked the spacing of the picots better this way.

Then, when going back under the skirt to work the undies, you only have 24 stitches to work in, not 30. (I took a picture so you could count them...go ahead...)
I worked that round of 24 sc, then repeated Rnd 25 to increase to 30 before starting to split for the legs.

Speaking of splitting for legs, since you work through 2 across the center, you end up with only 14 stitches on the first leg. So I did the same on the second, as I finished the first round (and I did start with a fresh piece, I didn't run a long tail out to work with), I worked the last one together with the first on the second leg.

Which is where I am now, contemplating working the shoes in one piece with the legs so as to avoid seaming. I get why you'd want to start those from the bottom. But since I know this nice way to finish off, with it looking almost identical to the start, I think I can make it work this way.

Thursday, July 29, 2010

X marks the oops

I was so pleased with myself as I finished the second half of the X. In fact, it was getting late, I should have been in bed, but I forced myself to finish, because I was so close. So I was feeling pretty good, having worked hard to catch up when I've been so far behind.
Until I put them on top of each other to make sure they matched up okay, decide if one side looked better, etc.
And they didn't match up.
At first I thought, "that'll teach me to make them on different days". Or, "maybe I didn't use an H hook for the first one?" But, no, as I sized up individual "legs", I could see they seemed to be the same. Yet one X was shorter. Somewhere in there.
The first one.
By a lot.
Really a lot.
So I counted rows.
And...
I have no idea what happened, how I missed 4 whole rows, or which rows they were.

AAAAAAAUUUUUUGH!

That would explain why the second one looks like the "legs" of the X line up:
 and the first one looks...wonky:
Frogged half of it and started over.
Am nearing end of skein, with no desire to buy another just to finish my X.
Not loving this.

Wednesday, July 28, 2010

Is it just me? Or does this suggest "ostrich"?


oh, so that's what he meant...

Monday night, I'm in bed already, Twin1 comes to my bedroom door and says "Wire mouse got mold", and walks away. Leaving me wondering just what sort of twilight zone I've slid sideways into, and just how tired am I, anyway? What in the world could he possibly have meant to say, did I really hear him right? But I'm too tired to chase after him, so I just lay there, wondering.

Now I know:

When I put the letters up, they said "Good Ol Summertime". Except there weren't enough M's for that, so one of them was an upside-down W.

I'm speechless.

Tuesday, July 27, 2010

Mega Cute Pea Babe

I ran away again, same place as my previous escape, this time for a long weekend (I skipped out of the office Thursday afternoon, and stayed until Sunday morning. It was lovely. Jealous?), and I used part of that time to finish up some projects.
Um, wait, that's exaggerating a bit. I think I only finished this one.
And an octopus for my niece. (Start to finish, inspired by this pattern, but I totally reworked it so you don't have any seams, and you get 8 legs instead of whatever she did. No nose, either. Maybe I should write that up? Forgot to take a picture.)*
But I did work on some other Year of Ami projects.
I just didn't quite finish any others.
Yet.
But I will.
Soon.

Anywho, here's the adorable, mega cute, Peababe! Finally!
Taking a ride in my pocket as I packed up to go home Sunday morning.

I'm not sorry I picked this little fella. But it did take me forever, just like I knew it would.
It's not a difficult pattern, just a lot of stitches. And with it all in tiny thread, I couldn't work on it in semi-darkness, or pick it up and do a few stitches in between doing other stuff, or work on it at all if I was tired.

I found one possible error. The leaves say to chain 10 (or 9, for the smaller leaf), and start stitching in the second chain from the hook. Then you go on to use 10 (or 9) chains total to stitch in, which you don't have, you only have 9 (or 8). So I ripped it back and added another chain. Alternatively, you could do (2sc, ch, 2sc) in the last chain as you turn to work back up the other side. I also decided to make my leaf shape more rounded, so I substituted hdc at each end of the dc sections. For example, on the small leaf, starting in second chain from hook, I worked as follows: (2sc, hdc, 3dc, hdc, 2sc) chain, turn, repeat on other side of chain. I'm thinking it might have looked cuter on mine if I made both leaves shorter, so they'd be wider.

Instead of doing a chain foundation with a row of sc for the necklace, I did a sc foundation chain. It's just tied on with a bow in back, using the tails.
I pulled up a loop near the leaves on the hat to do the tendril, so I didn't have to sew that on after.
His eyes are 9mm, which would mean that if you did one in worsted weight, you'd need some pretty big eyes to get the same proportions.
He doesn't sit up on his own. I don't know how something with feet like this can, unless it has a tail. Which this doesn't.
I really want to make the female version, with that cute skirt and the bright colors. That will have to wait a while, though.

*working on the octopus had me thinking, "gee, wouldn't this be cute in perle cotton? it would be so cute and tiny...I could totally make one with the pink I have left over." Luckily, I recovered my senses before I got out the hook again. Besides, have you ever heard of a pink octopus? Of course not. And green wouldn't have worked, either. Good thing I didn't have any orange. Or periwinkle. (Must. stop. picturing. tiny. octopus.)

Yarn: DMC "Coton Perle 5" in skeins. 3348 for main color (3 skeins), 818 for face & hands (1 skein), 502 for leaves (1 skein). I have some leftovers of all the colors, but you use up 2 skeins of the main color well before you've finished the feet (assuming you did body and arms first). Size 6 (1.6 mm) steel crochet hook.

Monday, July 26, 2010

Year of Ami, week 27, A is for Alien!

Alrighty, anyone agitated about this? I think we're ready to start at the beginning again, don't you?

To knit, I have an adorable, hopefully simple, Mini Alien from Fuzzy Mitten

To crochet, a very Curious Alien. I hear his feet are a bit tricky, but I think I'm up to it.

(I am almost caught up from the first round. Will be posting more pics and projects soon.)

*pics of my own creations added after-the-fact*

Friday, July 23, 2010

Yip Yip Knit


I totally winged it here. Tried casting on 30 stitches at first, but that was too many, so I started over, cast on 20. I think maybe 25 would have been better. Followed the proportions of the pattern, left 8 stitches for the face. Again, fewer than that, and no face to speak of.
Same eyes. Tentacles are braided.
I'd like to figure out a better/smoother way of doing the mouth/head portion. I'm wondering if this would work better knit from the top down?
Still, I think he's just as adorable as his crocheted friend.
Yarn: Caron Simply Soft Brites in Blue Mint

Thursday, July 22, 2010

show off

Here's my table runner, started almost 2 months ago, finally finished.
Obviously, not on a table. My tables never seem to stay cleared. Give me a horizontal surface, and it's going to have stuff on it. Sometimes pretty stuff, but mostly, stuff.

I machine quilted it. I'm not proud of how that turned out. Don't be looking at the back of it, okay? It looks fine from the front, unless you look close. But hey, I'm done, and it's a nice addition to my patriotic decor.

Wednesday, July 21, 2010

Yip Yip Crochet!

Isn't he adorable?

Super quick, very easy. The eyes totally make this.
I ended up with 22 stitches around, and I worked the face portion until there were 8 stitches left. Less than that, and I think it would be too skinny. I just decreased by skipping the first stitch at the beginning of each round, as suggested in the pattern.
I worked 2 tentacles in each stitch around the bottom. For each set, I measured off a yard (did you know? the distance from the tip of your finger to your nose, with your arm out to the side, is about a yard? yup, close enough) and looped it through a stitch as directed. I started off doing one at a time, then figured it wouldn't hurt to try looping a bunch and going back to chain. Found that it worked out just fine, no tangles, so I looped all the rest of them through and worked my way around. I chained until I ran out of yarn on each length, then cut the tail close to the knot.

Like I said, quick and easy.
Yarn: Caron Simply Soft Brites in Mango

Team Charlie?

I just read this post, and then re-read mine, and now, I'm thinking, maybe I'm not the only one out there quoting Bella's dad more than any other character.

I think we need a t-shirt.
(ahem: this is actual t-shirt image from here. seriously.)

Plus, it's not creepy.
You know, since he's neither 100+ years old nor a teenage wolf-boy, he's 43 (and not just another pretty face - see his bio here).
Not to mention, as far as we know, an ordinary human.

(Now you know what to get me for my birthday)

Tuesday, July 20, 2010

quick getaway

I ran away for a last-minute retreat with my good friend (and somewhat sister) this past weekend. I had a certificate for a free night at Zermatt up in Midway, and since it was about to expire, I thought I'd better get myself up there PDQ.

We stopped at Seasons of Home and Everything In The Barn before checking in. This town closes up early, and we didn't want to miss out. We found some cute stuff, and skipped up to the resort quick so we wouldn't be late for our spa appointments.

The room was lovely
the bathroom was spacious

the view was tranquil (we saw a badger on this hillside - for reals!)
and the weekend was just right.

I had the pedicure, she had a facial. I did a little knitting while I relaxed in the massage chair.

For dinner, we headed over to Heber and got ourselves Train Burgers (Have YOU been hit by a Trainburger lately?) at the Dairy Keen, followed by the best shakes ever (a bit delayed, they lost the shake orders, we had to wait, so we got coupons for $2 off next time - bonus).

Once back in our room, we changed into our bathing suits and headed for the jacuzzi. A relaxing 1/2 hour in there, a few laps in the refreshingly cool outdoor pool, and we were ready to wind it down for the night.

We somehow slept in, missing the chance to have an early morning swim or steam-room session. Ah, well, that's what a getaway is for, right? We got ourselves ready to face the day, packed up our stuff, and checked out just before 11am.

But on the way to the car, we were distracted.

They had this uber-cool chess game set-up out in front.
After stowing our stuff in the car, we raced back over, wishing we had something just like it at home. We soon discovered that the little playhouse where they stored the pieces

also contained checkers! (good thing, as neither of us knows how to play chess, and we were considering just having a game of checkers using chess pieces, which could have looked...odd.)

We quickly set up for a game and made our first couple of moves
I then proceeded to beat the pants off her (I'm playing white)
I did a little victory dance (not really), and then we replaced the chess pieces, ready for the next victims.
They also had an 18 hole mini-golf course nearby, but by that time, we'd had enough of the heat and were ready to get into town, step into something with air conditioning.

A little window-shopping in town (literally, since the shops were closed), then over to Park City, admire the stuff in Whimsy, and head for her place in Fruit Heights. (we picked up Panda for dinner - yum!)

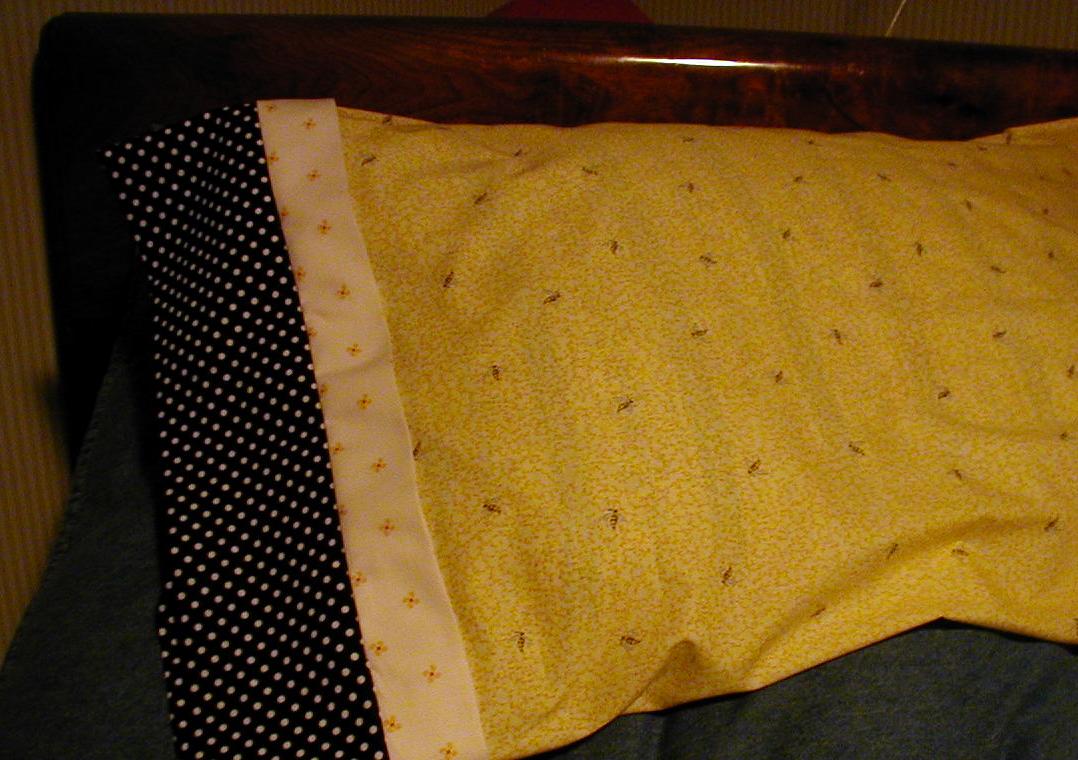
It was nice to extend my break a little, relaxing at her house and talking. We also threw together the pillowcases from Seasons of Home (her kit was for her son). As soon as I was home, I slipped it on my pillow, ready to settle in for a good read before bed.


We had such a great time!

Monday, July 19, 2010

and decreases again...

Year of Ami, week 26, Z is for...

Zoinks, you won't believe what zany stuff I found!

To crochet, an adorable little doll (with parts and pieces, oi, I must really want one...) name of Zoe Lily-Belle. (I love her hair!)

And to knit, a little weird, (and again with the parts and pieces!) but still cute, Zozo's.

We're officially half-way! I'm going to take a group picture, so we can see what that looks like. (hint: it's a lot of stuff; just ask my kids)

*pics of my own creations added after-the-fact*

Saturday, July 17, 2010

and back to increases...

but now in pink! and partially stuffed!

Yes, finally, the body is done, and we're on to the head!
Bet you can't see my color change, even though it's right there in front of you.

I'll wait while you enlarge the picture...

See? almost invisible, right? That's because I found this great tutorial for a "jogless" stripe, from Needle Noodles. I think it's pretty clever. Try it next time you need to make a color change like this.

(Did you remember to stagger your decreases/increases? Good for you.)

Friday, July 16, 2010

X marks the (halfway) spot

This is a lot bigger than I'd expected. I think it might be time to employ a little math before choosing projects. Maybe even set a limit for myself as to what constitutes "small" or "quick", in terms of total stitches required to complete the item.
Still, a clever little thing to crochet.

I got confused when starting the second section, and I started at the wrong end of the row. Which meant that I had the fat side of the X where the skinny side should have been, and I had to rip it back and start over.

Ugh.

In case you were confused, too, let me share. When it said, "place a marker in the last sc on Row 22", that's what I did. I put it in the last sc, not the last stitch of the foundation chain. Which, it turns out, is where it should have gone. At any rate, start up again with section 2 at the far end, over the "fat" leg, at the outside edge of the foundation chain. (Would it have killed them to say that? You know, just to clarify for those of us who tend to over-think stuff?)

Speaking of foundation chains, this one seems to be done a little differently from Snuffykin's version (which we used for the eel), and I'm not sure if that was on purpose or not. So I'm going to try it the Snuffykin way when I make the other half, and see how that looks.

I'm considering doing a few rounds of sc at the edges,  possibly as a way to join the two halves, so it ends up more like a block letter instead of a flat-edged pillow. (Does that make sense?)

Yeah, I know my curves are all curled up on the edges. I'll steam it out before I try to put it together with the other half. Promise.

Voodoo Knitting

He looks kinda happy for someone with pins stuck in him, no?

I used a new-to-me technique on my knitted voodoo doll. I'd never before heard of doing a provisional cast-on with a crochet hook, but it was easy to learn, and it worked great! I think it's easier to explain to a new knitter than the sling-shot method, as well. There are a bunch of tuts out there, but this is the one I used. I was so intrigued when I stumbled across it, I ripped out all 10 rnds I'd knitted so far, and started over.

Speaking of ripping back, I couldn't figure why you'd want to knit 20 rounds when you start the head, if you're going to rip out 5 of them when you come back and take out the provisional cast-on. However, because I tend to do things as written, at least the first time, I went with it. And it's probably a good thing. You rip back a few rounds because that way you don't have to join a new yarn to finish the head. Good plan. Except, I had a couple yards of yarn left over, so maybe 5 rounds is too much? Or possibly I lost count and ripped back a round or two more. Not sure.
Changes/mods: I only did one round of decreases on the arms, because after finishing one the way it was written, I just didn't like how it looked. So on the second arm, I tried it with just one round, and then changed the first arm to match. Less pointy.
I also opted to backstitch the heart instead of cross-stitch it. I just wasn't in the mood last night as I was trying to finish him up, I guess. Also not sure I'd have had enough red yarn on me (I'd done the provisional using red, so I'd have it there to make the heart with).
I'm not sure I agree with the idea of just cinching it at the neck instead of shaping, but, he looks okay.

I could have used a stitch count after the increase sets. In case you feel the same, I will tell you that after all the shoulder increases, you should have 46 stitches total, and after the torso increases, you will have 32 stitches (that looks like it couldn't make sense, but it does, since you place a bunch of stitches on holders after the shoulders).

(Are his legs a little long? Or is that just me?)

He's about 6" tall, making the two voodoo's look sort of parent/child proportioned.

Which is just kind of creepy.

Yarns: LB Woolease in Black,  Red. Probably Vanna's Choice in White for the facial stitches.

Thursday, July 15, 2010

Re-design in Progress

'nother giraffe, and a tiny pear

Whipped up this little fella a couple evenings ago, and got to finish up his mane while waiting at the dentist Tuesday afternoon. He's only 7" tall. Made from this vintage pattern, just for fun. I wasn't sure if maybe I was supposed to enlarge the pattern, but you do the ears and tail from measurements, and they look about right, so I guess this was the right size. They seem to think it's a baby toy, but I think that pencil-thin neck makes it more of a display item. Perhaps part of a Noah's Ark? I still haven't added anything for his eyes, because there's a flower in just the right spot on both sides. His mane seems a bit bushy to me, but Twin1 says not.

Made the pear a while ago, shrunk down the pattern from Fresh Picked by Heather Bailey. Tiny, a little hard to get those curves, but so cute. It's about 3" tall.

Fabrics were in my stash, no idea when or where I got them, but I've had both for a while.

Wednesday, July 14, 2010

double feature

I did a crazy thing last night. I went to two movies in a row. And I liked it.

First, Eclipse, with my fellow Bookettes. Because, you know, we've all read them, and we've gone to the other Twilight movies together, so, we had to.
Best Moment: Charlie comes out to see why Edward & Jacob are fighting, steps between them, pushes them apart like you would any two guys looking to rumble, and says, "lets take this down a notch", and then asks what happens. Jacob just blurts it out, "I kissed Bella...and then she hit me...and broke her hand." I just love Charlie's reaction there.
Close Second: Again, Charlie (because he's so much more likable and real in the movie), when he's trying (not) to have "the talk" with Bella, about "being careful", and she finally just blurts out that she's a virgin. After a second, he turns around, sandwich in hand, and says something like, "hmm, I'm starting to like this Edward kid."
But, enough about that. If you've read the books, the movie held few surprises.

The BEST part of the evening, so glad I stayed up late, was The Sorcerer's Apprentice. LOVED it! To be fair, I do think it could have been fleshed out just a bit more. I don't know what movie people do to take a movie from "good" to "I've-watched-it-so-many-times-and-I-still-love-it", but this one felt like it needed just that little bit more to make it irresistible.
(My experience may have a little something to do with sitting next to Mr Chattypants and his girlfriend - they kept up a commentary all through the previews and into the intro of the movie, and then either stopped or got quieter after that (the theater was not full, they could have sat anywhere...why is it always next to me?), but then both got up twice to use the bathroom or whatever, and left as soon as the credits came on. They missed the bit at the end, then, so that's fair.)

Speaking of irresistible, Nic Cage did not disappoint. Nope, not at all. And if that's not his real hair? They did a very good job with the wig.

Special effects, car chases, things blowing up, science, romance, this movie has it all.
Science? Yup. The kid is into physics, and he manages to make it look cool.

Very much worth seeing on opening night, definitely worth the price of the ticket. Stay to the very end because 1) it's polite movie etiquette, and 2) there's a little something worth seeing.

(BTW, that questionable moment in this preview? (mentioned previously here) Not in the movie. I guess they got the message.)

the other cushions

Finally got a picture of this in daylight. These took forever to cut out. Seriously, FOREVER. The floral fabric was a large loose weave, so I couldn't just rip it to get nice straight-sided squares, I had to cut along the threads. Then, for the check on the sides, since that was printed, I couldn't rip that either, in case the print wasn't on grain, so I had to cut along the checks. Worth it, though. I love how these look.
I need something different for the cushions at the back. I'm thinking large squares, either in the same check used for the sides, or a maybe a plain denim? I still need to make the bolsters, too. I cut them out that same evening, but I had so much else to get ready, I stopped once I'd done the seat cushions. Maybe I'll get back to those this weekend.
I also need to make button tabs so these cushions can become a flip chair like this one. That way, when we have to take the cushions inside due to rain or whatever, they're a useful seat instead of just a stack of cushions taking up space.
(And then there are the 3 others, for the love seat and chair that match this sofa. Also cut out, so at least I don't have to endure that torture again. So much still to do.)