Wow, what a week! Pattern errata, confusion, running out of yarn, and a lack of stuffing.
I was out and about while working on the fish, and realized, as I was just about to close up the fish-lips, that I couldn't do that until I'd stuffed him, and I had only a small amount of stuffing in my knitting bag. Oh, so sad! The lamenting that ensued...
However, I soldiered on. I left the two short circulars hanging from his mouth, took up the other end of the yarn, and started on his back fin using my double points. Twin2 looks at this, and points out how it looks like a catfish, with all those ends hanging down from his mouth. Wish I'd had the camera, so you could see this. Could have taken the pics once I got home, but was much to eager to finish, and closed up those lips as soon as I'd walked in the door and stuffed his little self.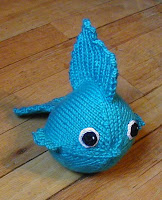
Can you blame me?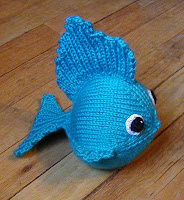
It's likely I'll make another, though, and I'll stop and take a pic for us. I'd like to figure out a way to get that catfish look for a finished fish, with yarn tails hanging or something. I'll work on that. Maybe when I try this guy out in sock yarn on tiny needles, which I think would be seriously adorable.
I worked his eyes as follows:
with black, 6 sc in magic ring, finish off.
with white, 6 sc in magic ring, inc around (12 sc), finish off, leaving a longish tail for sewing to fish.
stack black circle on white, a little off center, and sew in place with black.
make a tiny white stitch off to one side of black.
use white yarn tail to sew to fish face once the fish is finished.
The flask went well, once I'd gotten past the modifications/corrections I felt were necessary. I re-worked that white part so many times, I'm sure the yarn isn't quite white anymore. But I do think I got it right, in the end. For mods on the base, see my previous post, Taming Earl. For the white part, I worked as follows:
sc around in loops left from rnd 23, you should have 24 sc, not 18
decrease next rnd as written, but you will now have 18, not 12
work two rnds even
decrease next rnd, as originally written, (ie: dec, not inc) to get 15 sc
work rnds 6-10 even, and finish off. I'm pretty sure this is what it should have said, as the resulting shaping is most like her picture.
I ran out of white yarn on the orange one, which you can kind of see in that bump, where I worked over the two yarn ends when I added the next strand.
Gradation marks are made with black embroidery floss, 4 strands (because I had some handy already separated), and stitched across either 1 sc for the short ones, or 3 for the longer marks. I put them two rows apart.
Here, you can see a little bit down into the opening in the flask, which is what makes this ami so very cute.
I can see me using these in a mad scientist display for Halloween. I know I'll be making more of these, all different colors, but as it's Friday, I'll leave it for another day, so I can get going on the next week. I can also see myself making more "lab equipment" ami in the future, if I can figure out how to get the shapes I want. The more you do this stuff, the more it makes sense, so here's hoping we'll be seeing a test tube in the near future. Suggestions for other science stuff, please?
*update* 3/8/10 - Earl's designer has verified my guess at the corrections for the white part, and will make corrections to her pattern


No comments:
Post a Comment